Date/Time:
Table of Contents
| Content | Links on Page | Links to Video |
|---|---|---|
| Links to Parts | Link on page | — |
| Links to Software | Link on Page | — |
| Copying Retro Orange Pi to microSD | Link on Page | — |
| Wifi Setup | Link on Page | — |
| Putting Files into Retro Orange Pi | Link on Page | — |
| Retro Orange Pi: Atari Lynx Emulator | Link on Page | Link |
| Retro Orange: Banana Pi M2 Zero: Pi Review and Test | Link on Page | Link |
| Retro Orange Pi: Banana Pi Zero M2 with Fan Mod | Link on Page | Link |
| Retro Orange Pi: Mame | Link on Page | Link |
| Retro Orange Pi: Neogeo | Link on Page | Link |
| Orange Retro Pi: Retroarch Menu | Link on Page | Link |
| Retro Orange Pi: Save States | Link on Page | Link |
| Retro Orange Pi: Sega 32X with Banana Pi M2 Zero | Link on Page | Link |
| Retro Orange Pi: Sega CD Tutorial | Link on Page | Link |
| Retro Orange Pi: Send Files with USB Flash Drive | Link on Page | Link |
| Retro Orange Pi: Wifi Setup | Link on Page | Link |
| Retro Orange Pi: Playstation Tutorial and Test | Link on Page | Link |
There are many ways to play retro games, like playing it on your computer with a emulator, or buying many different video game consoles. However, you can also play retro games on a single board computer, like a Raspberry Pi, Odroid, Orange Pi, Banana Pi, etc. This video will be playing retro games on Retro Orange Pi which is a cross platform application for emulators. Retro Orange Pi, like Retropie comes with many different emulators, and the emulators that it does come with is enough to play most retro games. Unfortunately, Retro Orange Pi is no longer supported, so you cannot add new emulators. Also, you cannot update Retro Orange Pi as well. Retro Orange Pi is based on Retropie, so it functions very much like Retropie. However, there are some differences with Retro Orange Pi and Retropie in the menu.
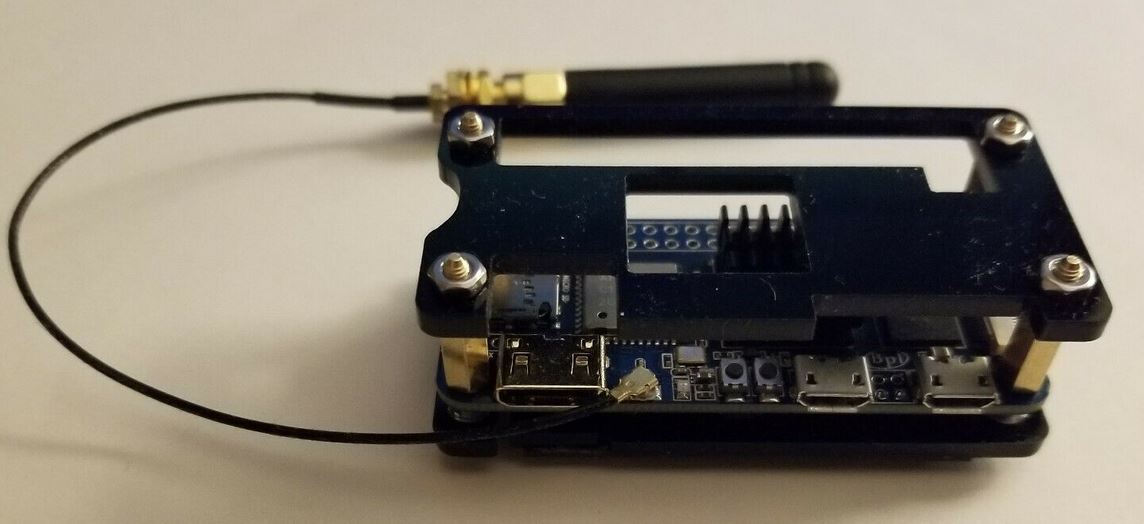
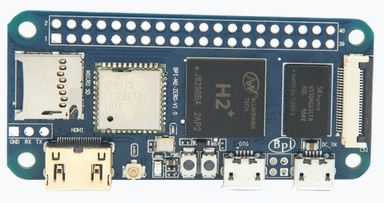
To make your own Retro Orange Pi SBC machine, you will need a Orange Pi, or a Banana Pi SBC. I used a Banana Pi M2 Zero, and it ran most emulators. I was able to run everything from the Atari 2600 up to a Sony Playstation 1, but it did have some performance issues with the Nintendo 64.
Even on the Raspberry Pi 3 B+ and the Raspberry Pi 4 2 GB/4 GB/8 GB the N64 emulator does not run this emulator well. The reason why I built this SBC with a image of Retro Orange Pi was so I could play retro games on my 55″ televison. You can hook it up to any computer monitor with a HDMI port on it as well.
To build one yourself, you will need a SBC(Banana Pi M2 Zero), a microSD card(32 GB or 64 GB), a power supply for the SBC, a mini hdmi to hdmi adapter, a usb adapter, microSD to USB adapter, USB hub, antenna, and a case for the SBC. You can buy all the parts individually, or you can buy them as a assembled kit. If you buy the assembled kit then all you need to do is to install the Retro Orange Pi image on a microSD card. If you buy the parts individually then you have to assemble the case and heatsink on the Banana Pi M2 Zero SBC, and you need to copy Retro Orange Pi image on a microSD card. The links for that will be below I also have a full tutorial video about it.
Full Retro Orange Pi Video
Links to Parts and Kits
▄▄▄▄▄▄▄▄▄▄▄▄▄▄▄▄▄▄▄▄▄▄▄▄▄▄▄▄▄▄▄▄▄▄▄▄▄▄▄▄▄▄▄▄▄▄▄▄▄▄▄▄▄▄▄▄▄▄▄▄▄▄▄▄▄▄▄▄▄▄▄▄▄▄▄▄▄▄▄▄▄▄▄▄▄▄▄▄▄▄▄▄▄▄▄▄▄▄▄▄▄▄▄▄
[Links to Parts]

♦ Banana Pi Zero M2 SBC
       • Link
♦ Raspberry Pi Zero Case/Power Adapter/HDMI to mini-HDMI adapter/OTG cable/GPIO Pins
       • Link
♦ Wifi Antenna
       • Link
♦ Samsung 32 GB microSD Card
       • Link
♦ Small Table Top Fan
       • Link
♦ Sabrent 4-Port USB 3.0 Hub
       • Link
[Fully Assembled Kit]
◙ Banana Pi M2 Zero
       • Link
▄▄▄▄▄▄▄▄▄▄▄▄▄▄▄▄▄▄▄▄▄▄▄▄▄▄▄▄▄▄▄▄▄▄▄▄▄▄▄▄▄▄▄▄▄▄▄▄▄▄▄▄▄▄▄▄▄▄▄▄▄▄▄▄▄▄▄▄▄▄▄▄▄▄▄▄▄▄▄▄▄▄▄▄▄▄▄▄▄▄▄▄▄▄▄▄▄▄▄▄▄▄▄▄
♦ Banana Pi M2 Zero w Accessories [Banana Pi M2 Zero SBC, 32 GB microSD card, power adapter, wifi antenna,
  case, hdmi to mini hdmi adapter, USB 2.0 Micro USB Male to USB Female OTG/4-Port USB 3.0 Hub]
       • Link
♦ USB MicroSD card reader
       • Link
♦ Small Table Top Fan
       • Link
▄▄▄▄▄▄▄▄▄▄▄▄▄▄▄▄▄▄▄▄▄▄▄▄▄▄▄▄▄▄▄▄▄▄▄▄▄▄▄▄▄▄▄▄▄▄▄▄▄▄▄▄▄▄▄▄▄▄▄▄▄▄▄▄▄▄▄▄▄▄▄▄▄▄▄▄▄▄▄▄▄▄▄▄▄▄▄▄▄▄▄▄▄▄▄▄▄▄▄▄▄▄▄▄
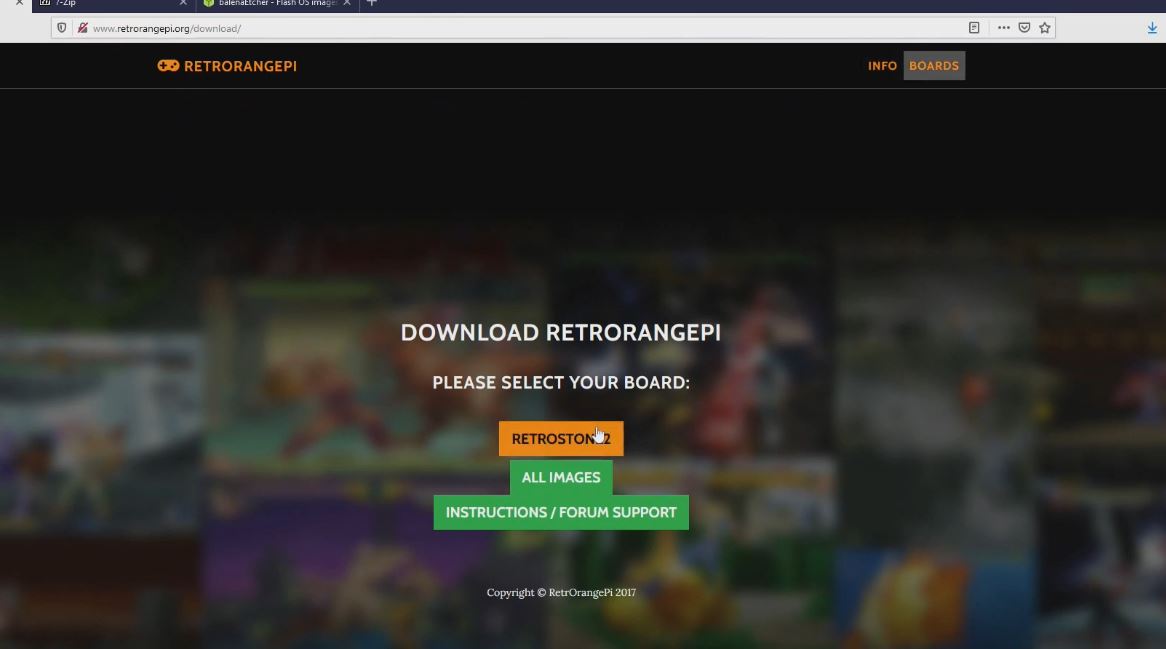
You will also need to get some software, like 7zip, the Retro Orange Pi image file, and Balena Etcher. All the software can be downloaded for free, and I will put the links for that below. I also made a tutorial video on how you can do that as well.
Links to Software
▄▄▄▄▄▄▄▄▄▄▄▄▄▄▄▄▄▄▄▄▄▄▄▄▄▄▄▄▄▄▄▄▄▄▄▄▄▄▄▄▄▄▄▄▄▄▄▄▄▄▄▄▄▄▄
[Links to Software]

◙ Orange Retropie Download Page
       • Link
◙ 7Zip Website
       • Link
◙ Balena Etcher Website
       • Link
▄▄▄▄▄▄▄▄▄▄▄▄▄▄▄▄▄▄▄▄▄▄▄▄▄▄▄▄▄▄▄▄▄▄▄▄▄▄▄▄▄▄▄▄▄▄▄▄▄▄▄▄▄▄▄
Copying Retro Orange Pi Image
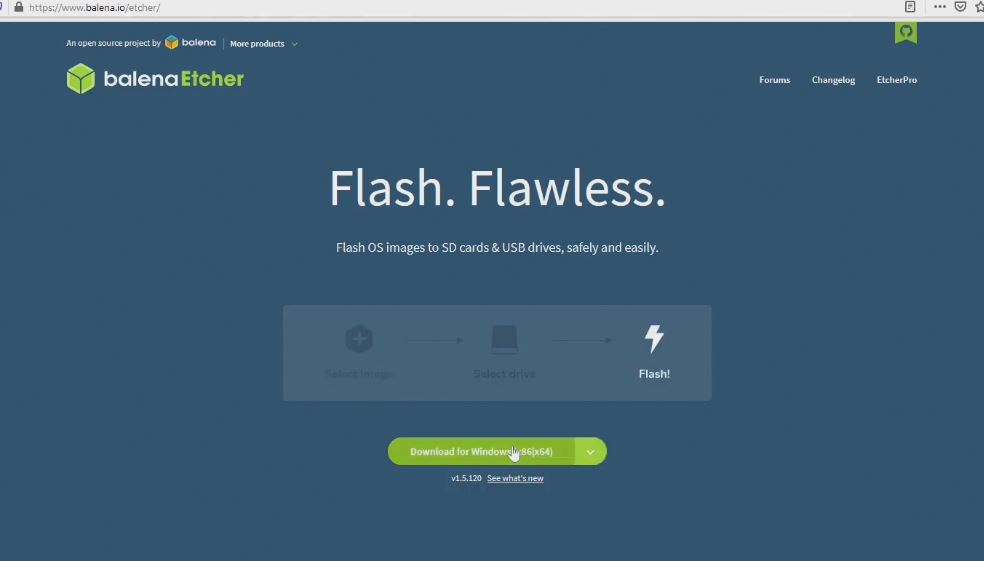
After you assemble your Banana Pi M2 Zero single board computer, download and install all the software you will need. Unzip the Retro Orange Pi file into a folder with 7zip. Put your microSD card in your USB card reader, and start Balena Etcher. Remove all USB storage devices that you don’t intend to use. Then, copy the Retro Orange Pi image file into your microSD card. Make sure you select the folder with the Retro Orange Pi image file, and select the USB storage you wish to use to copy your image file. Selecting the wrong USB storage device will cause everything in that USB storage device to be erased, and over written with this image file. The process will take a several minutes. After you finish, eject the USB storage device from your computer. Take the microSD card out, and put it into your SBC.
Hook up all the cables in your SBC, and turn on your SBC. It will take a few minutes for the operating system to start, so you will see a blank screen for several minutes. Don’t turn your SBC off. After everything gets configured, you will
hear a sound and a picture of Retro Orange Pi. Then, Retro Orange Pi will start up. The first thing you will do when the O.S. boots is to configure your controller. You can use any USB controller. Configure the controls.
Retro Orange Pi Wifi Setup
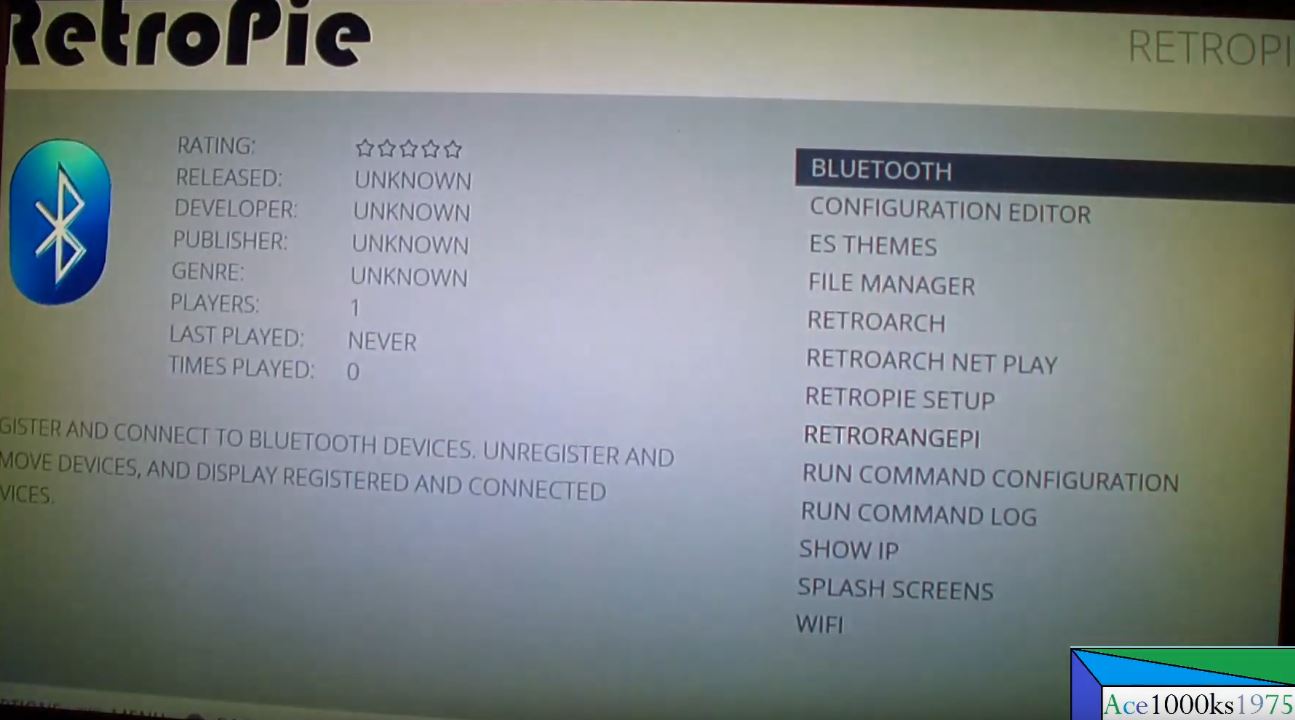
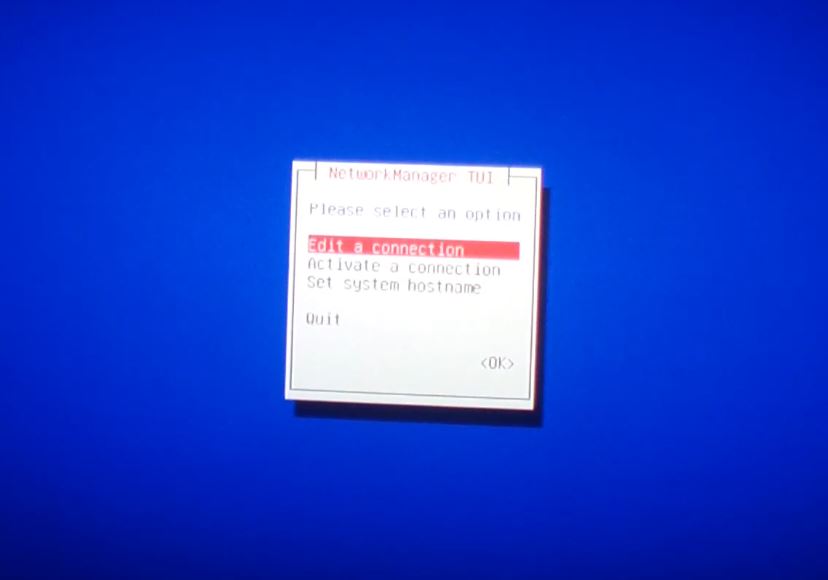
The last part would be putting roms into your Retro Orange Pi, and you can only do this through wifi because the Banana Pi M2 Zero SBC does not have a RJ-45 network port. Go to the Retropie menu, and go to wifi. You will have to use your USB keyboard to get this part done. Select activate connection, select your network, type in your password, and exit. The tutorial video for that is here. Wifi for Retro Orange Pi You can send files to Retro Orange Pi with a USB flash drive as well. USB Flash Drive with Terminal
Putting Files into Retro Orange Pi
This can be done two ways.
The first way is by connecting to Retro Orange Pi via wifi network Wifi for Retro Orange Pi ,
and the 2nd way would be to use a USB flash drive.

To use the flash drive, you need a USB hub, and a keyboard.
Press the "F4" key, and type in "MC" in terminal
You have have two sides, on a split screen. The left side is
where you are transferring from, and the right side is
where you are transferring files to.
The Video for that is here. USB Flash Drive with Terminal
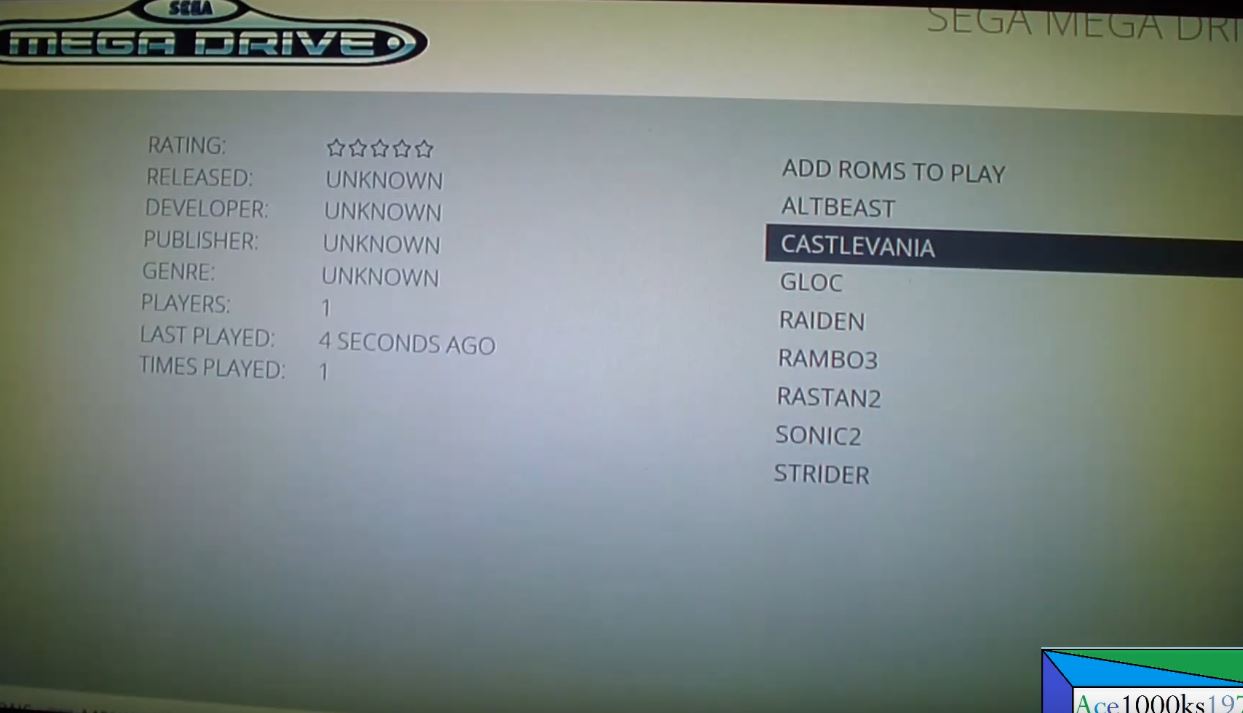
Press start, and reboot. Then, go back to your Windows based computer, and go to Windows explorer. There, type in \\RetrOrangePi or you can type in the IP address if you know it. \\192.168.X.XXX . Go into the roms folder, and you can put the roms into the appropriate folders. For example, NES for Nintendo Entertainment System roms, Mega Drive for Sega Genesis, PSX for Playstation,
PCE for Turbografx-16/PC Engine, etc. For some emulators, you will need to put the BIOS files in the BIOS folder to get the emulator to work.
In the BIOS folder, you can put the BIOS files for the emulators that require BIOS files. After you finished putting in all the ROM and BIOS files, go back to Retropie, and reboot it.
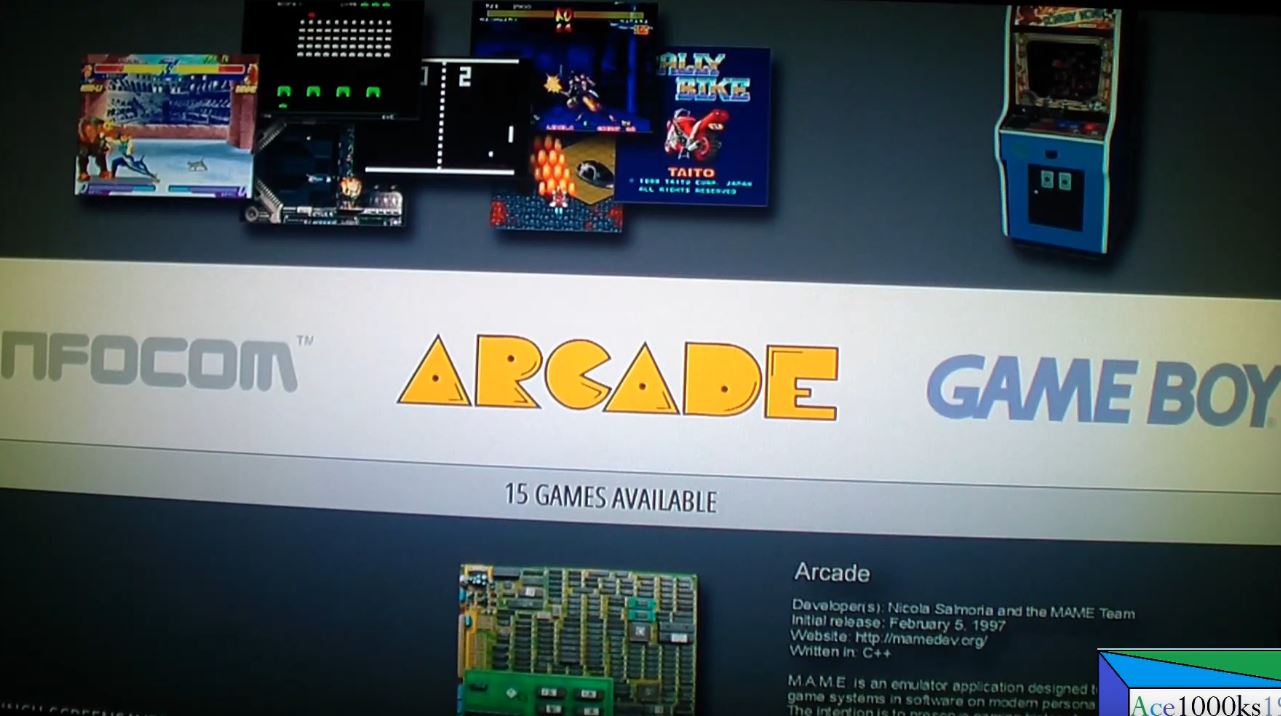
After you reboot Retropie, you will see new emulators which were not there before. Go to the emulator you want to use, and you will see ROMS/Games in that menu. Select the game you want to play, and press the action key. You will see an option to change the emulator when you start the emulation for the rom. You can press any key to go into that menu to change an emulator if it is available.
I have a tutorial video on how to do this, and other videos related to Retro Orange Pi. You can go to this link, and find all the videos about that. I will put a few below as well.
Retro Orange Pi Video List
▄▄▄▄▄▄▄▄▄▄▄▄▄▄▄▄▄▄▄▄▄▄▄▄▄▄▄▄▄▄▄▄▄▄▄▄▄▄▄▄▄▄▄▄▄▄▄▄▄▄▄▄▄▄▄▄▄▄▄▄▄▄▄▄▄▄▄▄▄▄▄▄▄▄▄▄▄▄▄▄▄▄▄▄▄▄▄▄▄▄▄▄▄▄▄
Retro Orange Pi: Atari Lynx Emulator
▄▄▄▄▄▄▄▄▄▄▄▄▄▄▄▄▄▄▄▄▄▄▄▄▄▄▄▄▄▄▄▄▄▄▄▄▄▄▄▄▄▄▄▄▄▄▄▄▄▄▄▄▄▄▄▄▄▄▄▄▄▄▄▄▄▄▄▄▄▄▄▄▄▄▄▄▄▄▄▄▄▄▄▄▄▄▄▄▄▄▄▄▄▄▄
Retro Orange Pi: Banana Pi M2 Zero Review and Test
▄▄▄▄▄▄▄▄▄▄▄▄▄▄▄▄▄▄▄▄▄▄▄▄▄▄▄▄▄▄▄▄▄▄▄▄▄▄▄▄▄▄▄▄▄▄▄▄▄▄▄▄▄▄▄▄▄▄▄▄▄▄▄▄▄▄▄▄▄▄▄▄▄▄▄▄▄▄▄▄▄▄▄▄▄▄▄▄▄▄▄▄▄▄▄
Retro Orange Pi: Banana Pi Zero M2 with Fan Mod
▄▄▄▄▄▄▄▄▄▄▄▄▄▄▄▄▄▄▄▄▄▄▄▄▄▄▄▄▄▄▄▄▄▄▄▄▄▄▄▄▄▄▄▄▄▄▄▄▄▄▄▄▄▄▄▄▄▄▄▄▄▄▄▄▄▄▄▄▄▄▄▄▄▄▄▄▄▄▄▄▄▄▄▄▄▄▄▄▄▄▄▄▄▄▄
Retro Orange Pi Mame
▄▄▄▄▄▄▄▄▄▄▄▄▄▄▄▄▄▄▄▄▄▄▄▄▄▄▄▄▄▄▄▄▄▄▄▄▄▄▄▄▄▄▄▄▄▄▄▄▄▄▄▄▄▄▄▄▄▄▄▄▄▄▄▄▄▄▄▄▄▄▄▄▄▄▄▄▄▄▄▄▄▄▄▄▄▄▄▄▄▄▄▄▄▄▄
Retro Orange Pi: Neogeo
▄▄▄▄▄▄▄▄▄▄▄▄▄▄▄▄▄▄▄▄▄▄▄▄▄▄▄▄▄▄▄▄▄▄▄▄▄▄▄▄▄▄▄▄▄▄▄▄▄▄▄▄▄▄▄▄▄▄▄▄▄▄▄▄▄▄▄▄▄▄▄▄▄▄▄▄▄▄▄▄▄▄▄▄▄▄▄▄▄▄▄▄▄▄▄
▄▄▄▄▄▄▄▄▄▄▄▄▄▄▄▄▄▄▄▄▄▄▄▄▄▄▄▄▄▄▄▄▄▄▄▄▄▄▄▄▄▄▄▄▄▄▄▄▄▄▄▄▄▄▄▄▄▄▄▄▄▄▄▄▄▄▄▄▄▄▄▄▄▄▄▄▄▄▄▄▄▄▄▄▄▄▄▄▄▄▄▄▄▄▄
Orange Retro Pi: Retroarch Menu
▄▄▄▄▄▄▄▄▄▄▄▄▄▄▄▄▄▄▄▄▄▄▄▄▄▄▄▄▄▄▄▄▄▄▄▄▄▄▄▄▄▄▄▄▄▄▄▄▄▄▄▄▄▄▄▄▄▄▄▄▄▄▄▄▄▄▄▄▄▄▄▄▄▄▄▄▄▄▄▄▄▄▄▄▄▄▄▄▄▄▄▄▄▄▄
Retro Orange Pi: Save States
▄▄▄▄▄▄▄▄▄▄▄▄▄▄▄▄▄▄▄▄▄▄▄▄▄▄▄▄▄▄▄▄▄▄▄▄▄▄▄▄▄▄▄▄▄▄▄▄▄▄▄▄▄▄▄▄▄▄▄▄▄▄▄▄▄▄▄▄▄▄▄▄▄▄▄▄▄▄▄▄▄▄▄▄▄▄▄▄▄▄▄▄▄▄▄
Retro Orange Pi: Sega 32X with Banana Pi M2 Zero
▄▄▄▄▄▄▄▄▄▄▄▄▄▄▄▄▄▄▄▄▄▄▄▄▄▄▄▄▄▄▄▄▄▄▄▄▄▄▄▄▄▄▄▄▄▄▄▄▄▄▄▄▄▄▄▄▄▄▄▄▄▄▄▄▄▄▄▄▄▄▄▄▄▄▄▄▄▄▄▄▄▄▄▄▄▄▄▄▄▄▄▄▄▄▄
Retro Orange Pi: Sega CD Tutorial
▄▄▄▄▄▄▄▄▄▄▄▄▄▄▄▄▄▄▄▄▄▄▄▄▄▄▄▄▄▄▄▄▄▄▄▄▄▄▄▄▄▄▄▄▄▄▄▄▄▄▄▄▄▄▄▄▄▄▄▄▄▄▄▄▄▄▄▄▄▄▄▄▄▄▄▄▄▄▄▄▄▄▄▄▄▄▄▄▄▄▄▄▄▄▄
Retro Orange Pi: Send Files with USB Flash Drive
▄▄▄▄▄▄▄▄▄▄▄▄▄▄▄▄▄▄▄▄▄▄▄▄▄▄▄▄▄▄▄▄▄▄▄▄▄▄▄▄▄▄▄▄▄▄▄▄▄▄▄▄▄▄▄▄▄▄▄▄▄▄▄▄▄▄▄▄▄▄▄▄▄▄▄▄▄▄▄▄▄▄▄▄▄▄▄▄▄▄▄▄▄▄▄
▄▄▄▄▄▄▄▄▄▄▄▄▄▄▄▄▄▄▄▄▄▄▄▄▄▄▄▄▄▄▄▄▄▄▄▄▄▄▄▄▄▄▄▄▄▄▄▄▄▄▄▄▄▄▄▄▄▄▄▄▄▄▄▄▄▄▄▄▄▄▄▄▄▄▄▄▄▄▄▄▄▄▄▄▄▄▄▄▄▄▄▄▄▄▄
Retro Orange Pi: Wifi Setup
▄▄▄▄▄▄▄▄▄▄▄▄▄▄▄▄▄▄▄▄▄▄▄▄▄▄▄▄▄▄▄▄▄▄▄▄▄▄▄▄▄▄▄▄▄▄▄▄▄▄▄▄▄▄▄▄▄▄▄▄▄▄▄▄▄▄▄▄▄▄▄▄▄▄▄▄▄▄▄▄▄▄▄▄▄▄▄▄▄▄▄▄▄▄▄
Retro Orange Pi: Playstation Tutorial and Test
▄▄▄▄▄▄▄▄▄▄▄▄▄▄▄▄▄▄▄▄▄▄▄▄▄▄▄▄▄▄▄▄▄▄▄▄▄▄▄▄▄▄▄▄▄▄▄▄▄▄▄▄▄▄▄▄▄▄▄▄▄▄▄▄▄▄▄▄▄▄▄▄▄▄▄▄▄▄▄▄▄▄▄▄▄▄▄▄▄▄▄▄▄▄▄